


Sequencer mode
552
On: If you edit the “Start” or “End” address, the
“End” or “Start” address will automatically be
adjusted to preserve the existing length between
“Start” and “End.”
Allow Tempo [Off, On]
This specifies whether the Region’s Tempo (see
“Tempo [40.00…240.00],” below) will be used when
executing the menu commands “Adjust Region to
Song’s Tempo (Time Stretch)” or “Adjust Song’s
Tempo to Region.”
Normally you will leave this turned on, and turn it
off only when using “one-shot” samples such as
rhythm instruments whose length you don’t want
to change even if the tempo is changed.
This is turned on when you record or import.
Tempo [40.00…240.00]
This specifies the tempo of the region.
This tempo is used when executing the “Adjust
Region to Song’s Tempo (Time Stretch)” or “Adjust
Song’s Tempo to Region” page menu commands.
For more information, please see “Adjust Region to
Song’s Tempo (Time Stretch)” on page 553, and
“Adjust Song’s Tempo to Region” on page 553.
The tempo at the beginning of recording is set at the
time of recording. With imported audio files, the
tempo is set to 120.00.
Song [000…199]
Audio Track [01…16]
These specify the song number and audio track that
are displayed when viewing regions for each audio
track if you’ve checked Song for “Select Region”
when using “Edit Region” or “Audio Event Edit.”
For details, see step 2.
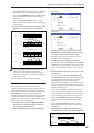
Play/Stop
When you press the Play button, the area from
“Start” to “End” will play back, allowing you to
audition the trimmed region. During playback, the
button is displayed as Stop; playback will stop if
you press it.
8. If you want to keep the changes you made in the
Trim dialog box, press the Done button.
If you don’t want to save your changes, press the
Cancel button. If you press the Cancel button, the
region will revert to the state prior to entering the
Trim dialog box.
9. When you’re finished with Region Edit, press the
Done button.
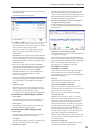
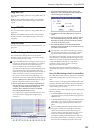
Volume Ramp
This command modifies the data values (volume) of
the specified area. You can gradually increase (Fade In)
or decrease (Fade Out) the volume between the start
and end points.
1. Use Track Select to select the audio track that you
want to edit, and use From Measure and To End of
Measure to specify the area that you want to edit.
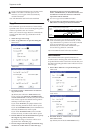
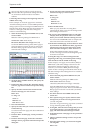
2. Choose “Volume Ramp” to open the dialog box.
3. Use From Measure, “To Measure,” and Beat.Tick
to specify the area on which you will execute the
command.
Specify the desired measures in From Measure and
“To Measure,” and specify the beat and clock in
Beat.Tick. By default, From Measure and “To
Measure” are set to the range of measures you
specified in From Measure and To End of Measure
of the Track Edit page.
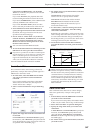
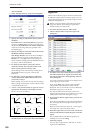
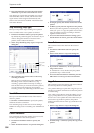
4. Use the radio buttons to select the type of volume
ramp.
Fade In: The volume will be zero at the beginning of
the range, and will gradually increase toward the
original volume at the end of the range.
Fade Out: The volume will gradually decrease from
the beginning of the range, reaching zero at the end
of the range.
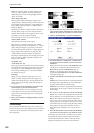
5. Use “Curve” to select how the volume will change.
Linear: The volume will change linearly. Choose the
Linear setting for a conventional fade-in or fade-out.
Power: The volume will change non-linearly. In
some cases, such as when you use the “Mix” menu
command to mix (cross-fade) a faded-in waveform
with a faded-out waveform, using the Linear setting
may produce the impression that the volume is
lower during the transition. If so, use the Power
setting.
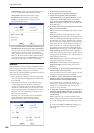
6. Press the OK button to execute the Volume Ramp,
or press the Cancel button if you decide to cancel.
Note: When you execute this command, a new region
and WAVE file will be created, and the file will be
named automatically. The audio event will also be
updated. Automation events will not be affected.
Fade In
Fade Out